Salt Dough Ornaments are fun for kids to make and easy enough for the littles to participate. Here are three different ways to shape salt dough into keepsake ornaments to give as gifts or hang on your Christmas tree. Double recipe to make extra ornaments. Let the older kids get creative and free style shape their ornaments, keeping the thickness the same on the entire ornament.
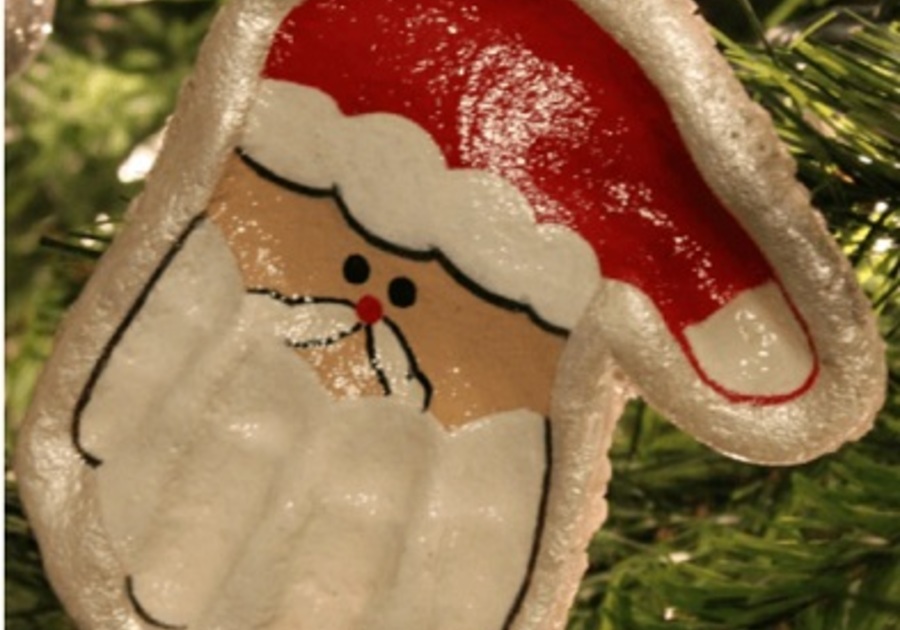
Santa Handprint Salt Dough Ornaments
Ingredients:
2 cups of flour
1 cup of salt
1 cup of water
Other materials:
1 straw
Red acrylic paint
White acrylic paint
Skin color (your choice) acrylic paint
Black paint pen or permanent marker
Embellishments, as desired
Sealant (I use Mod Podge)
String, yarn or ribbon
Instructions:
1. Mix ingredients together.
2. Add more water and flour as needed to make the dough smooth and no longer sticky to touch. Make sure you knead it until this happens.
3. Flatten the dough either with your hands or a roller, but not too thin to make a circle big enough to fit your child's hand inside.
4. Use a straw to make a hole in the palm.
5. Bake for 2-3 hours at 200 degrees, or until dry (turn every hour), or you can let them air dry for about 3 days.
6. Once the ornaments are dry, let them sit for a day, and then you are ready to paint.
7. Paint the palm with the red paint for Santa's hat.
8. Paint the fingers with the white paint to look like Santa's beard. Add white trim at the bottom of the hat and tassel at the tip.
9. Use the the skin-colored paint to add the face between the hat and the beard.
10. Draw in Santa's eyes with a black marker or black paint pen. And add a dot of red paint for his nose.
11. Add embellishments and outline as desired (see our photo), let dry, then coat with a sealant and let dry again.
12. Once dry, thread the string through the hole, tie a knot, and hang the ornament on the tree or wrap it up for a gift.
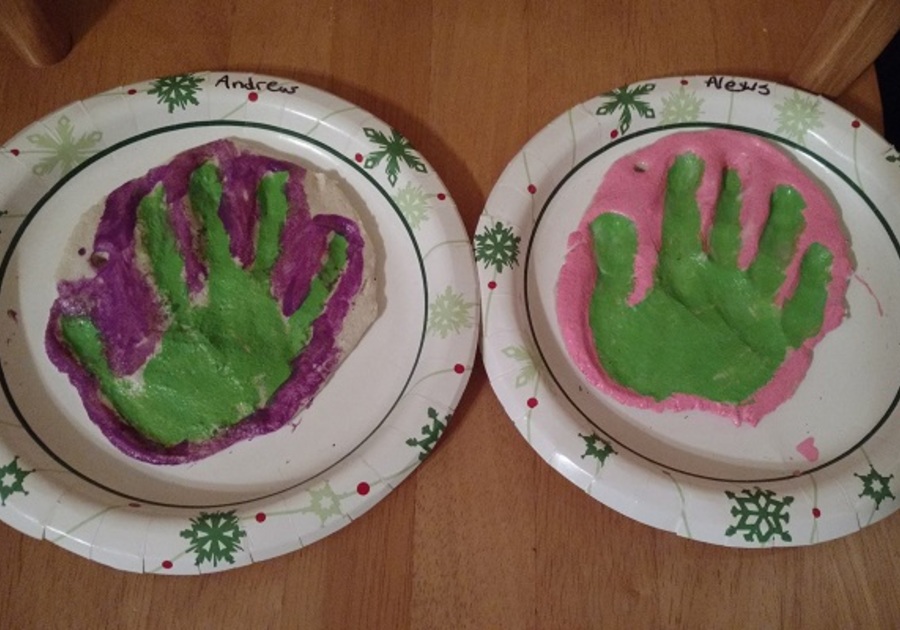
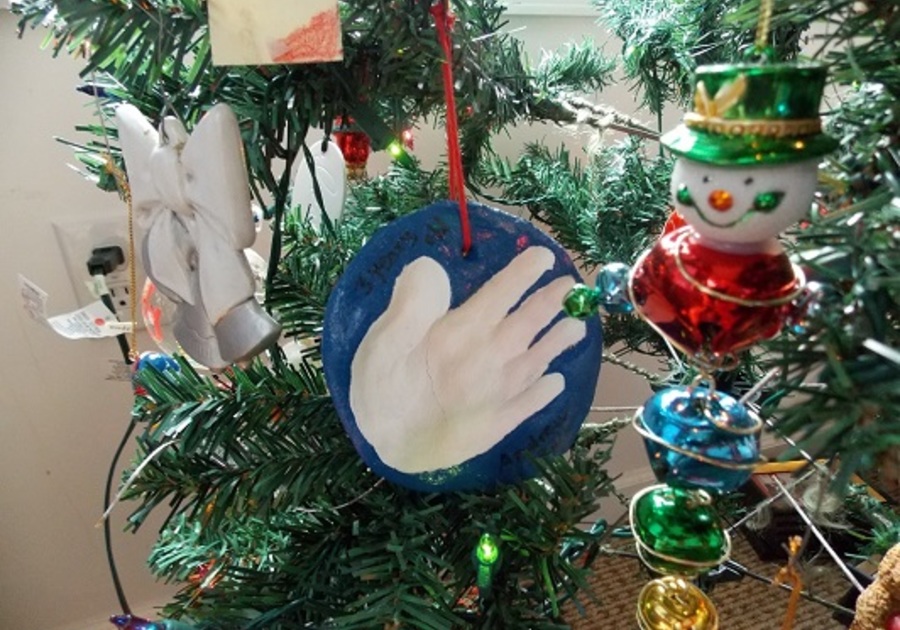
Handprint Salt Dough Ornaments
Ingredients:
2 cups of flour
1 cup of salt
1 cup of water
Other materials:
1 straw
Acrylic paints in your choice of colors
Black paint pen or permanent marker
Embellishments, as desired
Sealant (I use Mod Podge)
String, yarn or ribbon
Instructions:
1. Mix ingredients together.
2. Add more water and flour as needed to make the dough smooth and no longer sticky to touch. Make sure you knead it until this happens.
3. Flatten the dough either with your hands or a roller, but not too thin to make a circle big enough to fit your child's hand inside.
4. Use a straw to make a hole in the palm.
5. Bake for 2-3 hours at 200 degrees, or until dry (turn every hour), or you can let them air dry for about 3 days.
6. Once the ornaments are dry, let them sit for a day, and then you are ready to paint.
7. Paint as desired, using one color paint for the handprint and one for the border. Let dry.
8. Write your child's name and the year on the front or back with marker. Add glitter, sequins, or other embellishments if desired.
9. Coat with a sealant and let dry.
10. Once dry, thread the string through the hole, tie a knot, and hang the ornament on the tree or wrap it up for a gift.
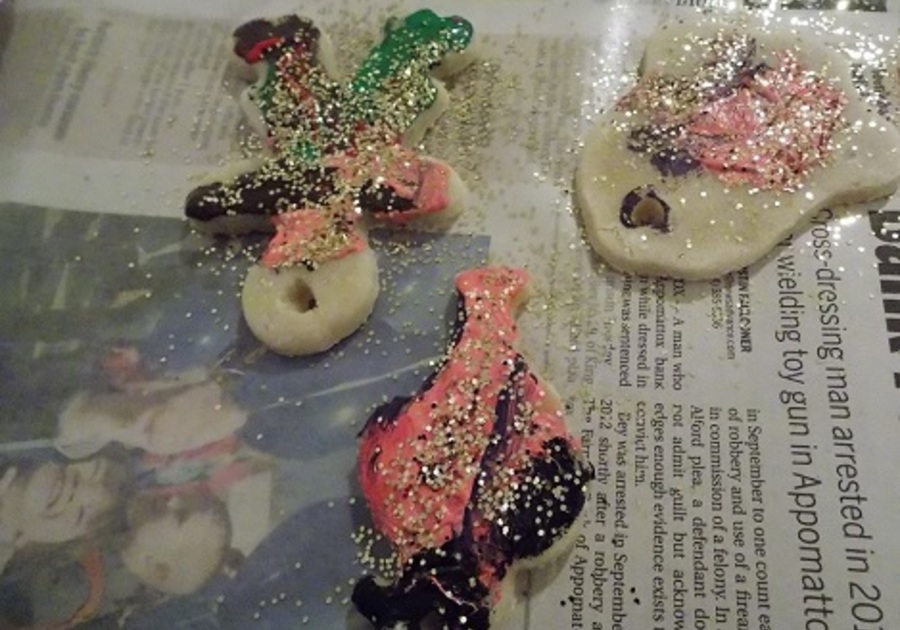
Cookie Cutter Salt Dough Ornaments
Ingredients:
2 cups of flour
1 cup of salt
1 cup of water
Other materials:
1 straw
Acrylic paints in your choice of colors
Black paint pen or permanent marker
Embellishments, as desired
Sealant (I use Mod Podge)
String, yarn or ribbon
Instructions:
1. Mix ingredients together.
2. Add more water and flour as needed to make the dough smooth and no longer sticky to touch. Make sure you knead it until this happens.
3. Flatten the dough either with your hands or a roller, then use cookie cutters to cut into shapes.
4. Use a straw to make a hole in the top of each ornament.
5. Bake for 2-3 hours at 200 degrees, or until dry (turn every hour), or you can let them air dry for about 3 days.
6. Once the ornaments are dry, let them sit for a day, and then you are ready to paint.
7. Paint as desired. Let dry.
8. Write your child's name and the year on the front or back with a marker. Add glitter, sequins, or other embellishments if desired.
9. Coat with a sealant and let dry.
10. Once dry, thread the string through the hole, tie a knot, and hang the ornament on the tree or wrap it up for a gift.
Kids also love making Sparkly Cinnamon Heart Ornaments. Click the link for the recipe.
You have to plan ahead a little to make hand-crafted ornaments, but the payoff is worth the time invested.
The Lynchburg Macaroni Kid 2020 Christmas Holiday Guide is your go-to for all things holiday from crafts and recipes to Santa locations and holiday lights.
Let Lynchburg Macaroni Kid help you Find Your Family Fun® for the holidays in Central Virginia